








Polishing a quartz countertop edge is not simply a matter of making the surface shiny. A production-ready process must remove cutting damage, preserve the selected profile, match the face finish, control heat, protect the resin-rich engineered surface, and deliver repeatable results at an acceptable cycle time. Small variations in abrasive sequence, pressure, water flow, feed speed, or tool condition can produce visible lines, haze, burns, waves, and color changes.
This guide explains how professional fabricators polish quartz countertop edges using hand tools, edge-polishing machines, and CNC machining centers. It covers preparation, abrasive selection, operating variables, common defects, inspection methods, and the point at which automation becomes financially justified. The objective is a stable shop process that works across recurring orders rather than a one-off cosmetic improvement.
What Makes Quartz Edge Polishing Different?
Engineered quartz combines mineral aggregate with polymer resin, pigments, and additives. Its appearance and polishing response differ from natural granite because the resin matrix can soften, smear, discolor, or lose gloss when exposed to excessive heat. The mineral fraction still requires diamond abrasives, but the process window is often narrower than operators expect.
Product formulations also vary. A dark solid-color slab can reveal fine scratches that remain invisible on a busy pattern. Slabs containing glass, mirror, recycled particles, or large aggregate may polish differently from uniform fine-grain products. Some surfaces tolerate a high final grit, while others match the factory face better with a different pad chemistry or a controlled finishing compound. Fabricators should qualify each material family instead of assuming one recipe fits every quartz brand and color.
Edge quality also begins before polishing. Chipping from cutting, excessive blade deflection, vibration, poorly supported overhangs, or an inaccurate profile creates damage that polishing cannot efficiently correct. For cutting fundamentals, see our guide on how to cut quartz countertops. A consistent cut reduces polishing time and protects the intended dimensions.
Define the Edge Profile and Quality Standard
Before selecting abrasives, define the finished geometry. Common profiles include eased, pencil, bullnose, half-bullnose, bevel, ogee, waterfall, and laminated edges. A simple eased edge requires limited material removal, while a decorative profile demands accurate tool tracking through curves and transitions. Laminated edges introduce a glue line that must remain visually controlled.
The acceptance standard should describe more than “high gloss.” Specify the profile dimensions, radius or chamfer, straightness, flatness, allowable chip size, scratch visibility, gloss range, color match, transition at corners, and permitted witness marks. State the viewing distance, light source, and whether the edge is evaluated wet or dry. Without a shared standard, operators may over-polish acceptable edges or pass defects that become obvious after installation.
| Quality characteristic | Practical shop control | Typical failure signal |
|---|---|---|
| Profile geometry | Template, radius gauge, caliper, or CNC program verification | Flat spots, uneven radius, changing bevel width |
| Scratch removal | Directional light and inspection after drying | Lines from an earlier grit reappear at final polish |
| Gloss consistency | Visual master sample and gloss meter where required | Cloudy bands, dull corners, local over-polish |
| Color stability | Compare with approved sample under neutral lighting | Darkening, whitening, yellowing, or resin burn |
| Edge continuity | Straightedge and tactile inspection | Waves, dips, ridges, or step marks between passes |
Tools and Equipment for Quartz Edge Polishing
Variable-speed wet polisher
A hand-held wet polisher is flexible for low-volume work, field corrections, inside corners, and custom details. Variable speed is essential because different pads and stages require different operating ranges. The machine should provide stable speed under load, effective water delivery, a suitable ground-fault protection system, and an ergonomic grip that allows the operator to keep the pad aligned with the edge.
Hand polishing has a low capital requirement, but quality depends heavily on operator technique. Pressure, dwell time, tool angle, overlap, and travel speed can change from one person to another. The method works best when the shop uses written procedures, master samples, labeled pad sets, and periodic skill checks.
Automatic edge polishing machine
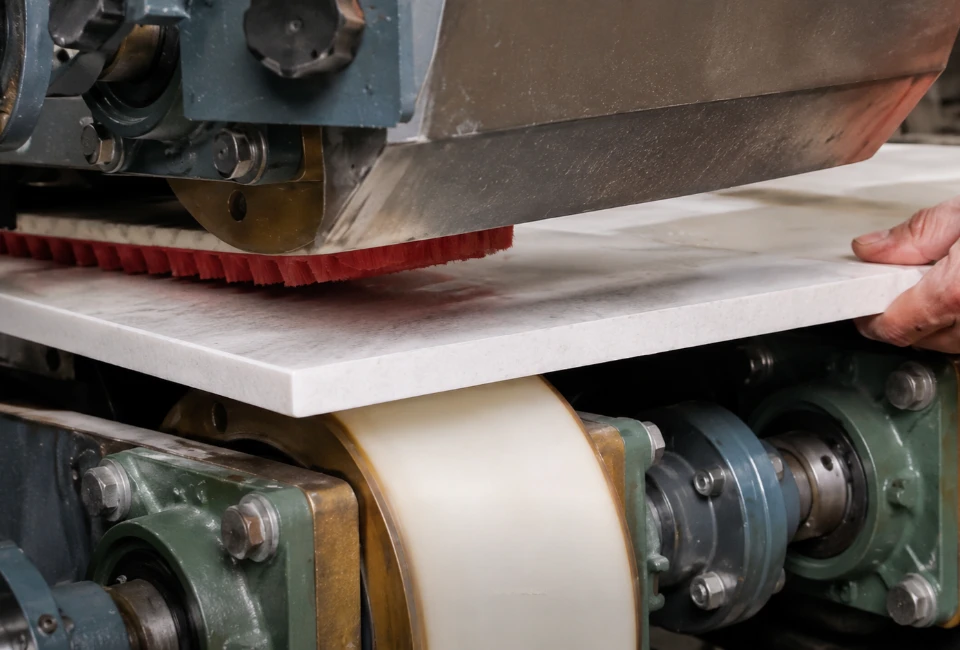
An automatic edge polisher uses multiple heads to calibrate, shape, refine, and polish a straight edge in a continuous pass. It is productive for repeated linear parts such as countertops, vanity tops, stair treads, and panels. Head sequence, spindle load, feed rate, pressure, and water can be standardized, reducing operator variation.
The equipment must match the required thickness, profile, minimum part size, and daily mix. A line optimized for straight flat edges may not replace manual work on curves or complex corner details. Our comparison of manual and automated edge polishing explains the labor, flexibility, throughput, and investment tradeoffs.
CNC stone machining center
A CNC machining center can profile, drill, create sink cutouts, and polish edges using automatic tool changes and programmed paths. It is especially useful for curved edges, sink openings, repeated custom geometry, and jobs that require coordinated milling and polishing. Vacuum workholding, tool measurement, correct offsets, and collision control are critical.
CNC equipment improves repeatability only when tooling data and programs are controlled. Worn profile wheels, incorrect diameters, poor suction-cup placement, or an unverified tool offset can reproduce the same defect across an entire batch. The cell therefore needs a defined tool-life system and a first-piece approval process.
Abrasives, Pads, and the Grit Sequence
Diamond polishing pads are available in resin-bond, metal-bond, hybrid, and material-specific formulations. Coarse tools remove saw marks and establish geometry. Intermediate grits remove the scratch pattern from the preceding step. Fine grits refine the surface and develop gloss. The exact labels and progression differ by supplier, so grit numbers should not be treated as perfectly equivalent across brands.
A representative sequence might begin at 50, 100, or 200 grit depending on edge condition, then progress through 400, 800, 1500, and 3000 grit. This is only a starting framework. Beginning too coarse wastes material and increases the depth of scratches that later steps must remove. Beginning too fine leaves cutting lines in the edge. Skipping a major interval may create an apparently glossy surface that still shows coarse scratches under directional light.
| Stage | Main purpose | Process risk | Control point |
|---|---|---|---|
| Coarse correction | Remove chips, saw marks, and profile errors | Excess stock removal and deep scratches | Use only when required; measure geometry frequently |
| Intermediate refinement | Replace coarse scratches with a uniform finer pattern | Missed lines from the previous grit | Clean, dry, and inspect before advancing |
| Fine polishing | Develop clarity, color, and gloss | Heat haze, resin smear, uneven sheen | Control speed, pressure, water, and dwell |
| Final finishing | Match the approved appearance | Over-polishing or chemical mismatch | Compare with a dry master sample |
Keep abrasive sets separated by material and profile where contamination can occur. A single coarse particle trapped on a fine pad can create a long scratch near the end of the process. Pads should be cleaned, inspected for embedded debris, dried appropriately, and replaced when the working face becomes glazed, uneven, torn, or dimensionally inconsistent.
Step-by-Step Quartz Edge Polishing Process
1. Inspect the cut edge
Check for chips, cracks, blade lines, burning, edge breakout, inaccurate dimensions, and profile variation. Confirm that the part is structurally supported and that any laminated joint has cured according to the adhesive specification. Do not begin polishing a defective blank without deciding whether correction will leave enough material and maintain the drawing dimensions.
2. Secure and protect the workpiece
Support the countertop on a clean, rigid surface. Prevent vibration and movement with appropriate clamps or vacuum fixtures, but avoid point loads that could damage a cutout or narrow rail. Protect the finished face from grit, metal contact, and slurry. Confirm that water and slurry cannot reach unprotected electrical equipment or create a slip hazard.
3. Establish the profile
Use a router bit, profile wheel, calibrated abrasive, or CNC toolpath to create the required geometry. Remove only the stock needed to eliminate cutting damage and reach the drawing. Keep transitions consistent through corners. For hand work, mark reference lines so the eased edge, radius, or bevel does not grow as the operator moves along the part.
4. Run the first polishing grit
Set speed within the pad manufacturer’s recommended range. Start water before loading the pad. Keep the tool face aligned with the profile and use steady, moderate pressure. Move continuously with consistent overlap; do not dwell at the start, end, or corner. The first grit is complete when the previous cutting pattern is replaced by a uniform scratch pattern and the geometry meets the standard.
5. Clean between every grit
Rinse the edge, pad, tool guard, and nearby work surface. Remove loose abrasive and slurry before installing the next grit. If possible, use dedicated pads and clearly labeled storage positions. Cross-contamination is a frequent reason a scratch appears after several apparently successful stages.
6. Progress without skipping defects
Each grit must remove the scratches left by the previous one. Inspect the entire edge, especially corners, sink radii, seams, and the lower edge that may receive less tool contact. If a deep line remains, return to the appropriate earlier step. Spending more time with a fine pad rarely removes a defect created by a much coarser stage efficiently.
7. Finish, dry, and inspect
Complete the qualified final grit or finishing stage, clean the part thoroughly, and allow the edge to dry. Water can temporarily hide fine scratches and alter the apparent color. Inspect under consistent neutral and directional lighting, compare the result with the master sample, and record any rework. Do not pack or install the part until the edge is dry and accepted.
Machine Settings That Control the Result
Speed
Excessive speed can increase heat, reduce pad control, and contribute to resin smear or burning. Speed that is too low may reduce cutting efficiency and encourage excessive pressure. Use the abrasive manufacturer’s rated range as a boundary, then qualify a production setting on the actual material. Record the setting rather than relying on an unlabeled dial position.
Pressure and spindle load
High pressure does not automatically polish faster. It can distort flexible pads, round the profile, generate heat, and produce uneven scratch removal. Very low pressure may prevent the diamond from working effectively. On automated equipment, spindle current or load can provide a repeatable process signal. On hand tools, operators need training to maintain a light, stable load.
Feed rate, overlap, and pass count
Feed rate determines contact time. Slow travel or excessive overlap increases heat and material removal; fast travel may leave incomplete scratch refinement. Automatic machines should define conveyor speed and head settings by product family. CNC programs should control path spacing, entry and exit, corner behavior, and the number of passes. Hand-polishing work instructions can specify approximate travel speed and overlap using timed sample parts.
Water flow
Water cools the interface, carries away swarf, and helps keep the abrasive open. Too little water allows heat and slurry buildup. Excessive uncontrolled flow can obscure the contact area, spread contamination, and create poor housekeeping. Direct clean water to the working zone and verify that nozzles remain correctly aimed. Filtration matters when recycled water contains particles capable of scratching the surface.
Common Quartz Edge Polishing Defects
| Defect | Likely causes | Corrective action |
|---|---|---|
| Visible straight scratches | Skipped grit, contaminated pad, incomplete prior stage | Identify scratch depth, return to the correct grit, clean the system |
| Cloudy or hazy finish | Heat, excessive pressure, unsuitable pad chemistry, incomplete refinement | Reduce load and speed, improve cooling, confirm sequence and pad type |
| Dark or burned area | High temperature, dry contact, long dwell | Stop immediately, restore water, reduce dwell; test whether correction is possible |
| Wavy edge | Uneven hand pressure, soft backing pad, repeated local correction | Use controlled support and full-length passes; verify with a straightedge |
| Rounded corners | Pad overhang, excessive dwell, poor CNC entry/exit | Support the pad, reduce corner dwell, modify the toolpath |
| Different gloss at seams | Material variation, adhesive contamination, unequal stock removal | Qualify the seam process and inspect components before assembly |
| Recurring chips | Poor initial cut, vibration, aggressive first grit, weak support | Correct cutting and fixturing rather than adding polishing time |
Defect analysis should identify the first stage at which the problem appears. If a deep line is present immediately after profiling, changing the final pad will not solve it. If the edge is correct until the last two stages, investigate heat, fine-pad condition, water quality, or finishing chemistry. This stage-based approach shortens troubleshooting and prevents random parameter changes.
Quality Control for Repeatable Production
Create an approved master sample for each important quartz family, color group, and edge profile. Store samples away from sunlight, impact, and contamination. Inspection lighting should be consistent; movable directional light helps reveal scratches, while diffuse neutral light supports color and gloss comparison.
Where contracts require objective data, use a gloss meter with a documented measurement angle and locations. Geometry can be checked with a straightedge, radius gauge, chamfer gauge, caliper, or profile template. Record first-piece measurements and any tool adjustments. The same disciplined approach used for stone cutting tolerances and quality control should extend through edge finishing.
- Approve the first finished edge before releasing a batch.
- Inspect after drying; do not rely on the wet appearance.
- Track abrasive set, tool hours, operator or program, and material code.
- Define rework limits so geometry is not polished below tolerance.
- Separate process defects from slab inclusions or pattern variation.
- Use nonconformance data to adjust the earliest responsible operation.
When to Automate Quartz Edge Polishing
Automation is justified when the cost of variation, labor, rework, and constrained capacity exceeds the installed cost of the equipment and supporting systems. High volumes of straight edges are natural candidates for an automatic multi-head polisher. Curved profiles, sink cutouts, and repeatable custom shapes may favor a CNC machining center. A mixed shop may combine automated primary processing with manual finishing for corners and unusual details.
Measure the current process before buying. Record labor minutes per meter, queue time, first-pass yield, rework, abrasive consumption, throughput by profile, and operator availability. Compare these values with a supplier demonstration using the shop’s own materials and acceptance standard. Include loading, setup, cleaning, tool changes, maintenance, training, and downstream balance in the cycle-time calculation.
Capital price is only one part of the decision. The CNC stone cutting machine cost guide provides a framework for comparing equipment, installation, utilities, tooling, service, and return on investment. The same lifecycle-cost method applies to polishing equipment.
Build a Material-Specific Polishing Trial
Prepare representative quartz samples covering light and dark colors, fine and coarse aggregate, straight and curved profiles, seams, and the maximum required thickness. Give suppliers the same acceptance criteria and require them to document tooling, grit sequence, speed, feed, water, pass count, cycle time, and consumable condition. Evaluate dry samples under your production lighting before approving a process or machine.
Production Checklist
- Confirm quartz brand, color, thickness, profile, dimensions, and acceptance standard.
- Inspect the cut for chips, cracks, burning, blade lines, and adequate stock.
- Support the part and protect the finished face from contamination.
- Select the least aggressive starting grit that removes the actual damage.
- Verify tool speed, pad rating, pressure, feed, overlap, water, and pass count.
- Clean the edge, pad, machine, and work area between grit stages.
- Do not advance until the preceding scratch pattern is fully removed.
- Inspect corners, seams, lower edges, sink radii, and transitions carefully.
- Dry the edge before final visual and dimensional acceptance.
- Record the qualified recipe and update tool-life information.
Perguntas frequentes
What grit should I start with when polishing a quartz edge?
Start with the least aggressive grit that can remove the deepest cutting or profiling marks while preserving the required dimensions. A clean edge may not require the coarsest pad. Test on a representative offcut because quartz formulations and pad systems differ.
Can quartz countertop edges be polished dry?
Some tools are marketed for dry use, but dry polishing raises heat and dust-control risks and may narrow the acceptable process window. Professional shops should follow the slab, abrasive, and equipment manufacturers’ requirements and comply with applicable silica-dust controls. Wet processing is commonly used for cooling and swarf removal.
Why does the quartz edge look polished when wet but scratched when dry?
Water temporarily fills fine scratches and changes light reflection. The edge must be cleaned and dried between critical stages and before final inspection. If lines reappear, return to the grit capable of removing them rather than adding more time at the final stage.
How do I prevent burning or discoloration?
Use adequate cooling, correct speed, moderate pressure, continuous movement, and a qualified pad system. Avoid dwelling at corners or local defects. Stop if the surface temperature or appearance changes; continuing can permanently affect the resin matrix.
Is an automatic edge polisher better than hand polishing?
An automatic machine generally provides higher throughput and repeatability on compatible straight profiles. Hand tools remain useful for low volume, field work, corners, curves, and unusual details. The correct choice depends on product mix, labor, quality targets, and utilization.
Can the same pads be used for granite and quartz?
Some abrasive systems are marketed for multiple materials, but identical results are not guaranteed. Quartz resin content and color sensitivity can require a different pad chemistry or operating range. Qualify the complete sequence on each material family and prevent cross-contamination.
How can a shop match the polished edge to the factory surface?
Use an approved dry master sample, consistent lighting, and a material-specific finishing recipe. Control the preceding scratch sequence because final gloss cannot hide deep marks. For critical work, measure gloss at defined locations while also checking color and texture visually.
Conclusion
Reliable quartz edge polishing comes from controlling the complete process: cut quality, workholding, profile geometry, abrasive sequence, tool condition, speed, pressure, feed, water, cleaning, and dry inspection. The final pad cannot compensate for poor cutting or an incomplete intermediate step.
Fabricators should qualify recipes on representative materials, document the successful settings, and use first-piece approval with master samples. Hand tools, automatic edge polishers, and CNC machining centers can all produce professional results when they are matched to the geometry and production volume. The best process is the one that repeatedly meets the drawing and appearance standard at a measurable cost per finished edge.